Adaptador de Ethernet intel 82577lm detectado como 82577lc, marca error y no funciona
Esto me pasó en una laptop Dell Inspiron E6410, ahora que lo pienso será un 2 en uno.
En éste equipo instale Windows 10 en modo EFI, todo bien, funcionaba pero no se apagaba, buscando encontré que podría ser el INTEL MANAGEMENT ENGINE INTERFACE (Intel MEI) y su driver, nunca funciono actualizar ni instalar versiones anteriores porque la máquina seguía sin apagarse, cambie a Windows 8.1 y seguía sin apagarse, podría ser el adaptador de red el culpable, supuestamente el chip ethernet 82577lm es el mismo que el de 82577lc así que forcé instalar el driver de uno en otro.
Al reiniciar no había conectividad de red y en el administrador de dispositivos el adaptador de ethernet aparecía con otro nombre y con un signo de admiración.
 |
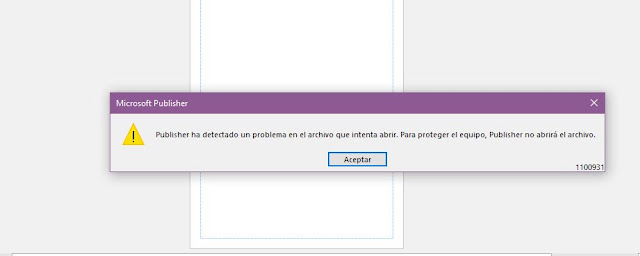
| Error al detectar el adaptador de Red Intel 82577lm |
Y la laptop seguía sin poderse apagar (quedaba con el led de encendido brillando y todos los ventiladores girando)
La primera solución para que la máquina se apagara fue desactivar el arranque UEFI y dejarlo en Legacy, Windows 8.1 y posteriormente Windows 10 se apagaba perfectamente, pero seguía sin funcionar el adaptador de Ethernet que antes de forzar el driver sí funcionaba, y tampoco funcionaba forzar a instalar el driver correspondiente.
Curioseando dentro de las carpetas del driver, encontré una carpeta llamada NVMCHECK, el nombre me sugería que había un programa para modificar el firmware del chip de ethernet y corregir mi error, aunque solo funcionaba en Linux.
Descargue el driver de aquí https://downloadcenter.intel.com/es/download/21642/Controlador-de-adaptador-de-red-Intel-para-Windows-8-versi-n-final
Dentro se encontraba la carpeta Tools (PROWinx64\APPS\TOOLS) con un programa nombrado DIAGS.exe y que solo funciona en MS-DOS, utilizando el disco hiren's Tools corrí una versión de MS-DOS y pude ejecutar el programa:
A continuación transcribo (copio y pego) el contenido de la documentación incluida.
Intel Adapter Test Utilities
· Starting the Test Utilities
· View Adapter Configuration
· Test Adapter Menu
· Set Up as Responder
Intel's diagnostic software lets you test the
adapter to see if there are any problems with the adapter hardware, the
cabling, or the network connection. You can also use diagnostics to isolate
problems during troubleshooting. There are four test programs documented here.
Both test Intel® adapters, and operate identically.
- DIAGS.EXE runs under MS-DOS* v6.22 or later. (It
will not run from a Windows Command Prompt within any version of the
Microsoft* Windows* operating system or in any other non MS-DOS operating
system..)
- DIAGS64.EFI for the EFI environment in
Itanium®-based systems.
- DIAGES64E.EFI for platforms based on
the Intel® 64 Architecture
These utilities are designed to test hardware
operation and confirm the adapter's ability to communicate with another adapter
in the same network. They are not throughput measurement tools.
The utilities can test the adapter
whether or not there is a responder present. In order to do a thorough test,
however, you should set a responder system prior to starting the test. If there
are hot keys, the letters will be highlighted.
 |
NOTE: If there is an MS-DOS network
driver present, such as NDIS2 or DOS-ODI, the test utility and/or the network
driver could become unstable. You should reboot and ensure that there are no
network drivers loaded.
|
Starting Under
MS-DOS
- Boot to MS-DOS.
- Navigate to the \APPS\TOOLS directory.
- Type DIAGS, and press
<Enter>
The test utility program automatically scans the hardware and lists all Intel-based adapters. They are listed in the following manner:
o If you have only one
network connection in your system, this screen will be bypassed.
o If you have a dual-
or quad-port adapter, each port is listed separately starting with Port A,
then Port B, etc. You can find the port information on the bracket label.

Select the adapter you want to test by moving the highlight and pressing <Enter>.
- The test utility displays its main menu:

Starting Under the
EFI Shell
- Boot to the EFI shell.
- Navigate to the \TOOLS\EFI64\EndUser
directory.
- Type DIAGS64 or DIAGS64E and
press <Enter>
The test utility program automatically scans the hardware and lists all
Intel-based adapters. They are listed in the following manner:
o If you have only one
network connection in your system, this screen will be bypassed.
o If you have a dual-
or quad-port adapter, each port is listed separately starting with Port A,
then Port B, etc. You can find the port information on the bracket label.
Select the adapter you want to test by moving the highlight and pressing
<Enter>.
- The test utility displays its main menu:
Selecting "View Adapter Configuration"
will bring up the adapter configuration screen. This screen describes various
properties of the adapter.

Press <F5> to view additional information on the PCI slot occupied by the adapter. This is primarily used for troubleshooting by technical support.

Press any key to return to Adapter Configuration.
Selecting "Test Adapter" from the Main
Menu brings up the Test Menu. This allows you to test the adapter, select which
tests to perform, or perform networking test.

Begin Adapter Tests
Selecting this option brings up the test screen.
While tests are being performed, a rotating spinner is shown letting the user know
that the application is still "alive." The results of the tests are
displayed as each test is performed. If multiple test passes are selected, then
the results contain a count of test failures. A list containing zeros means
that all tests have passed. Single tests will display "Passed" or
"Failed" for each pass.

The test setup screen allows you to configure and
select the specific tests desired. Each option is toggled by moving the cursor
with the arrow keys and pressing <Enter> to change the option. The number
of tests is simply entered from the keyboard in the appropriate box. If
there is a gap in the menu, that means the test is not supported by your
adapter. By default, local diagnostics run automatically, while network
diagnostics are disabled.
|
|
NOTE: The test program will test
attributes that are applicable to your adapter. Only supported tests are
displayed. The screen shown here is an example of the types of tests
performed. |

Device Registers - Test patterns
are written, read and verified through the adapter's device registers to ensure
proper functionality.
FIFOs - This utility will
write test bit patterns to the adapter's FIFO buffers, to make sure the FIFOs
are working properly. Not all adapters have FIFO, so it will not appear in
all test lists.
EEPROM - Tests both
the readability of the EEPROM as well as the integrity of the data stored in
the EEPROM. It reads the EEPROM and calculates the checksum. This checksum is
then compared to the checksum stored in the EEPROM. If values are not the same,
the test reports failure.
Interrupt - This tests
the adapter's ability to generate an interrupt. On EFI, interrupts are not
supported. Therefore, this test sets the interrupt cause register and reads the
interrupt set register, verifying the card internally registered an interrupt.
MAC Loopback and PHY
Loopback - There are two internal loopback tests. These tests set the
adapter in the appropriate loopback mode and send packets back through the
adapter's receive circuitry and logic. These tests are chipset dependant and
may not be selectable.
Link - This checks to see if the
adapter has link or does not have link.
Network Test - The Network
Test looks for a responder, and then sends packets. If no responder is found,
then the test reports failure. If no link is found, it will also report a
failure. If packets are received back from the responder, the test
reports success.
|
|
NOTE: In some cases, the network
test will fail if the adapter is connected to a switch with Spanning Tree
Protocol (STP) enabled. |
Networking Menu
The networking menu contains network specific tests
such as Spanning Tree detection and Network test responder.
 |
This allows the user to set up the adapter as a
responder so a connected system can perform the network test portion of the
diagnostics tests. Although you can use a variety of adapters as the responder
and connect directly or through a switch, the best results are obtained with a
cross-over cable and a same-type adapter.

When you press <Esc>, the responder
operation is cancelled and control is immediately returned to the Networking
menu.
Detect Spanning
Tree
Spanning trees can be troublesome in a networking
configuration. The Detect Spanning Tree option attempts to detect if a spanning
tree exists on the network. This is done by resetting the link and listening
for spanning tree packets.


Comentarios